How to Draw Ray Diagrams
This lesson covers:
- How to draw ray diagrams for concave and convex lenses
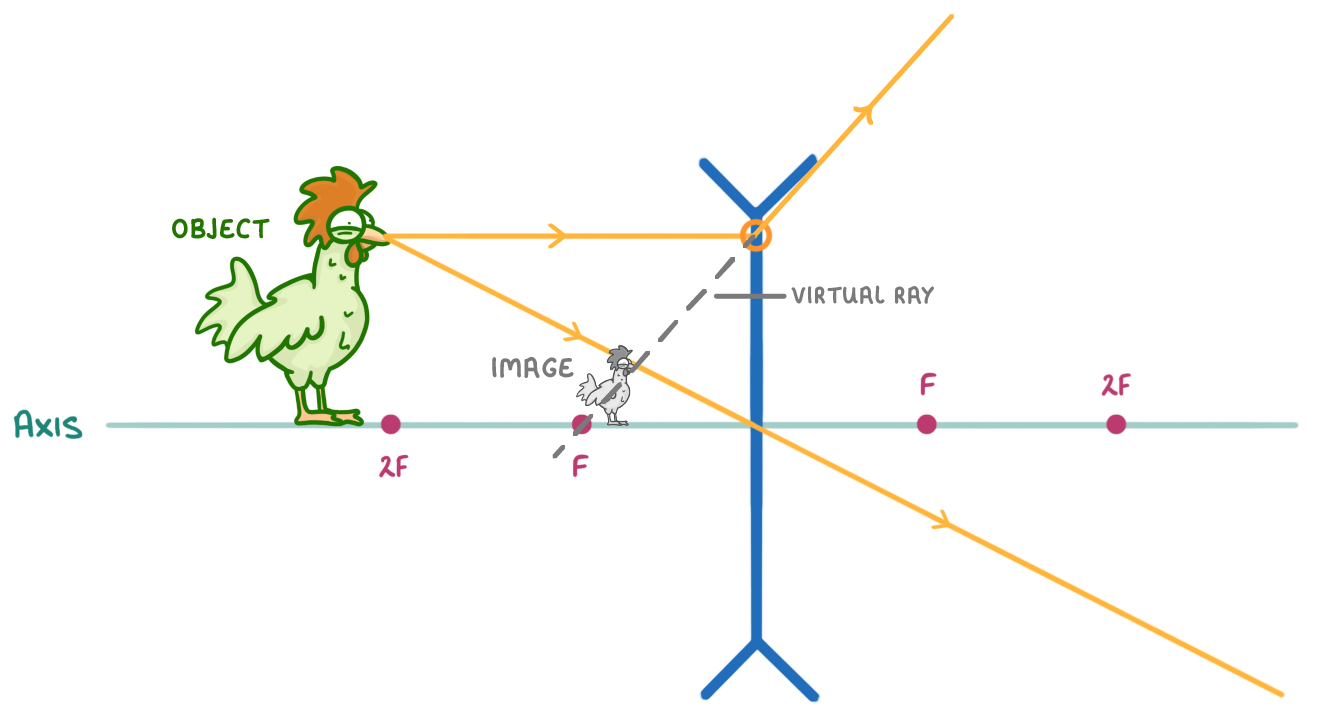 |
The above diagram is a ray diagram for a concave lens. |
The image in the diagram is: Virtual Real
|
The image in the diagram is: Upright Inverted
|
The image in the diagram is: Smaller than the object Larger than the object
|
|
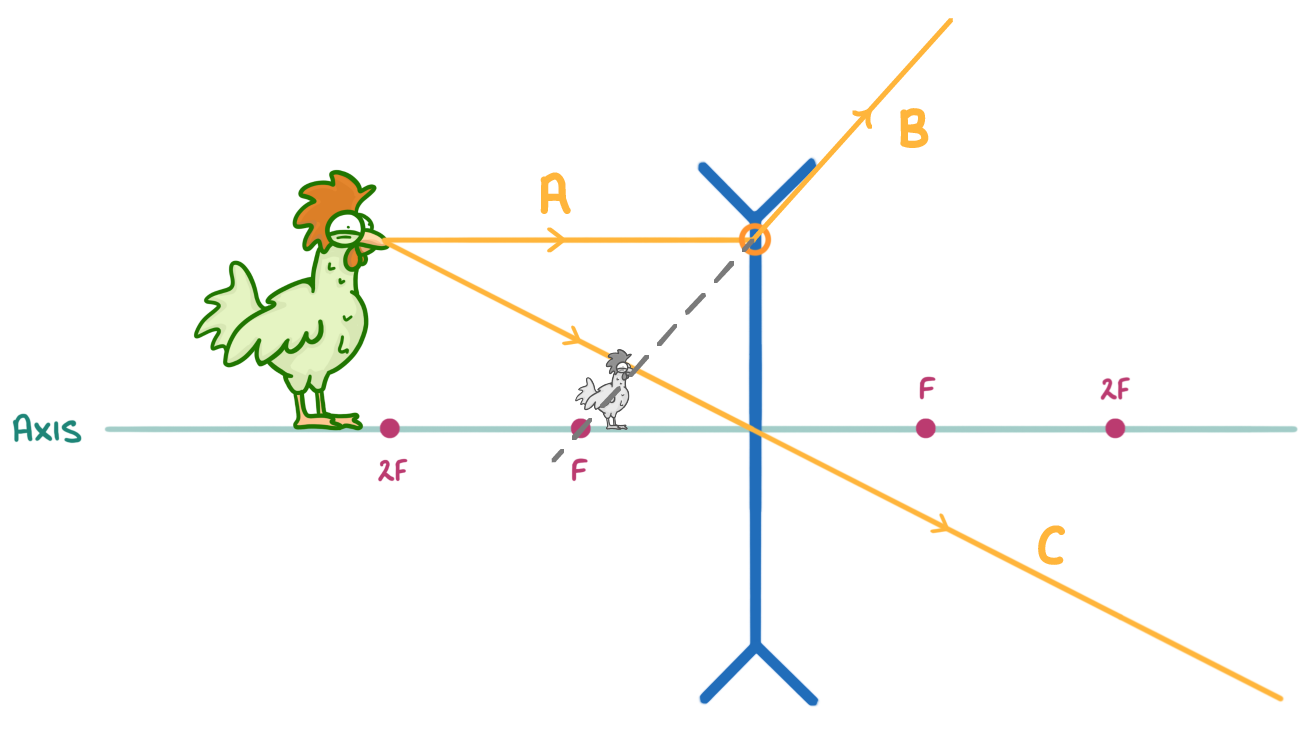 |
When drawing a ray diagram you need to draw two light rays coming from the top of the object and passing through the lens. Match the sections of light rays A to C on the diagram above, to the following descriptions: |
'A horizontal light ray from the top of the object, to the lens.' A B C
|
'A diagonal light ray travelling from the top of the object, though the centre of the lens.' A B C
|
'A light ray that has been refracted by the lens at an angle.' A B C
|
|
Using your own pen and paper, complete the ray diagram below.
When you're ready to check your drawing, press 'Continue'.

|
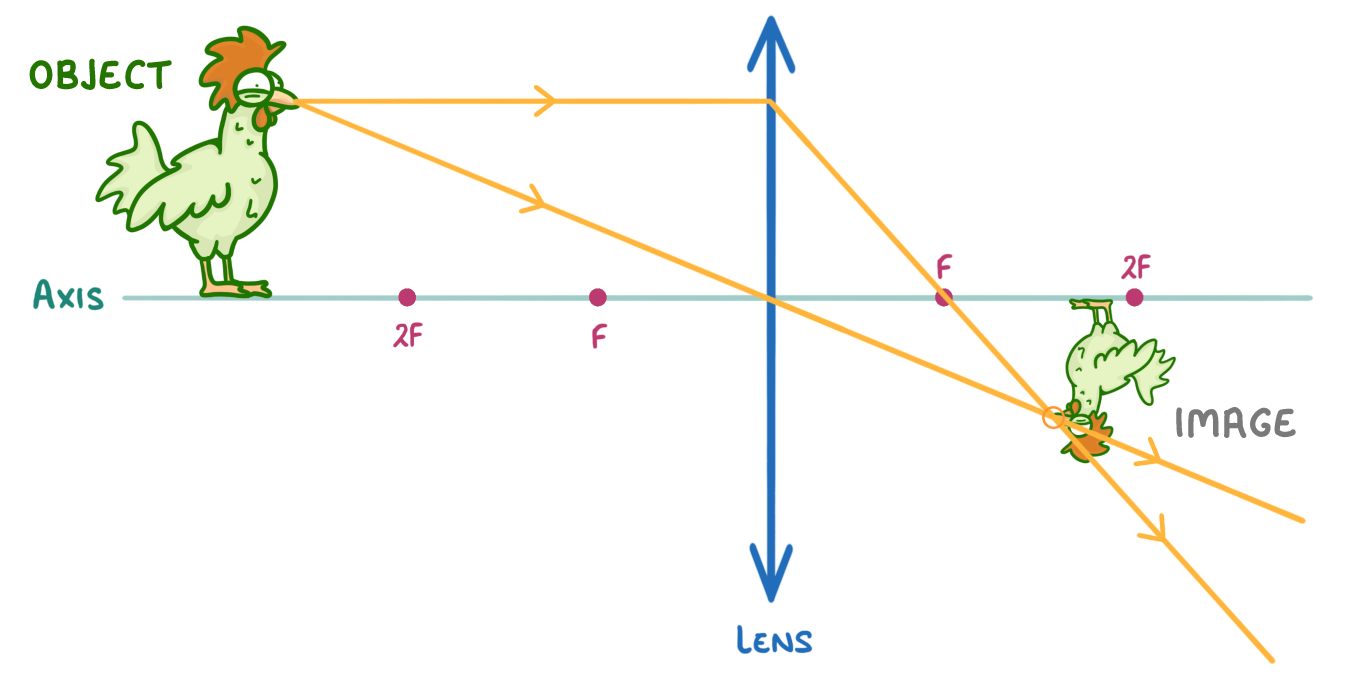
The above diagram is a ray diagram for a convex lens.
Please state whether the image is:
'Real' or 'virtual':
'Upright' or 'inverted':
'Bigger' or 'smaller':
|
Practice drawing your own ray diagram on a piece of paper.
The lens is a convex lens and the object is an upright arrow that is more than double the focal length from the lens.
When you're ready to check your drawing, press 'Continue'.
|