Light Microscopes

This lesson covers:

  1. How a light microscope works 
  2. How to prepare and view a microscope sample 
  3. The rules for biological drawings 

Microscopes 

Illustration showing a light microscope and the magnified image of a sample.

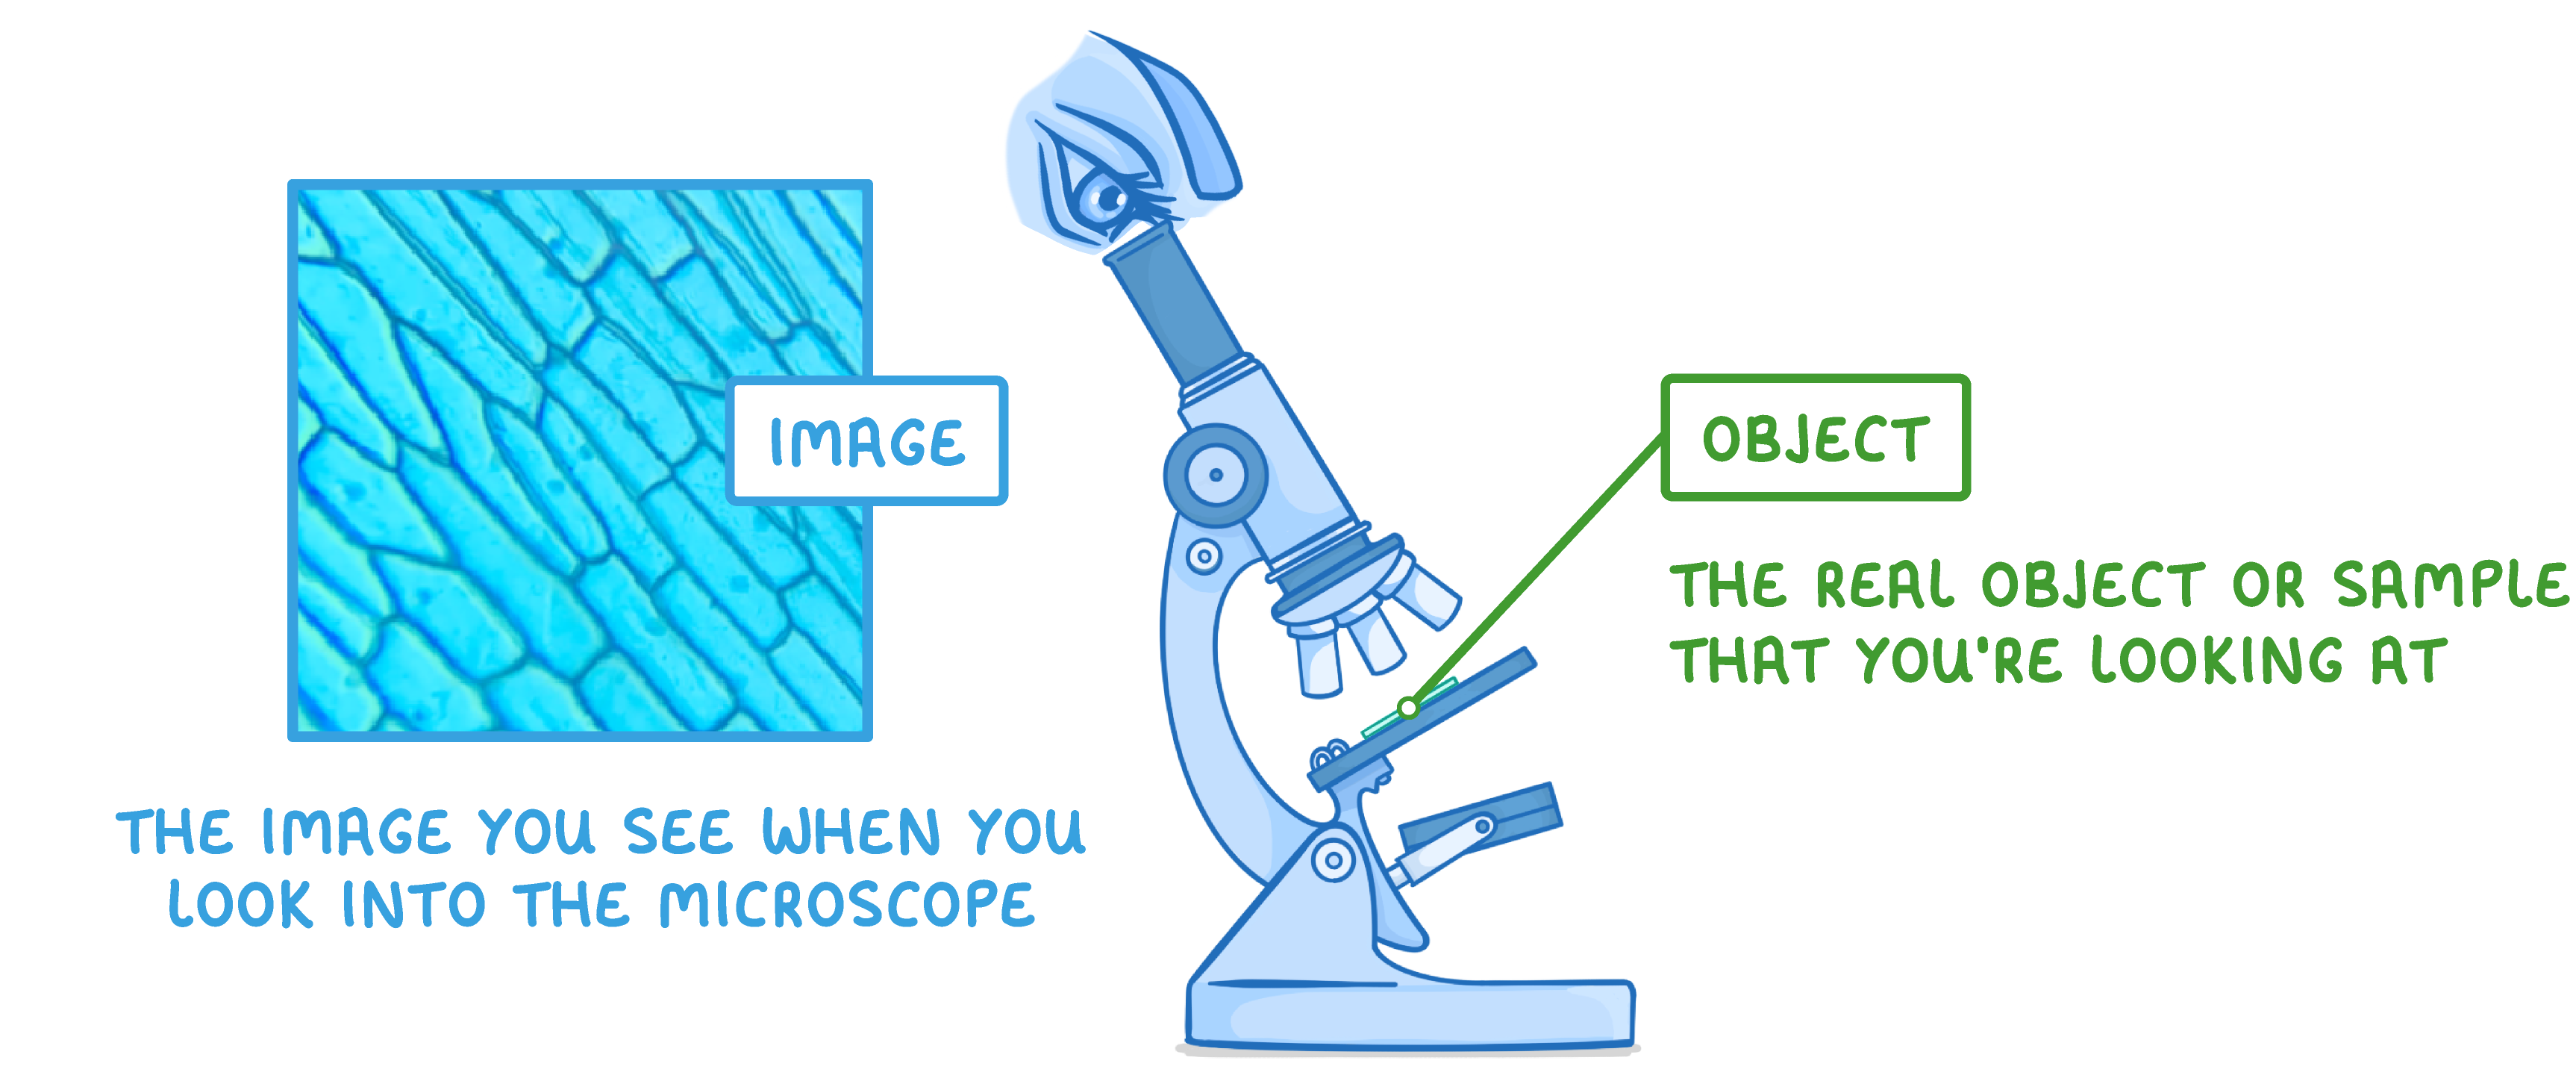
Biologists use microscopes to magnify cells and investigate their structures. The first type of microscope to be developed was the light (or optical) microscope. They work by creating an image that is much larger than the real object.

Light microscopes have a lower resolution and magnification compared to other microscopes:

  • Resolution - Maximum of about 0.2 µm.
  • Magnification - Maximum of about x 1,500.

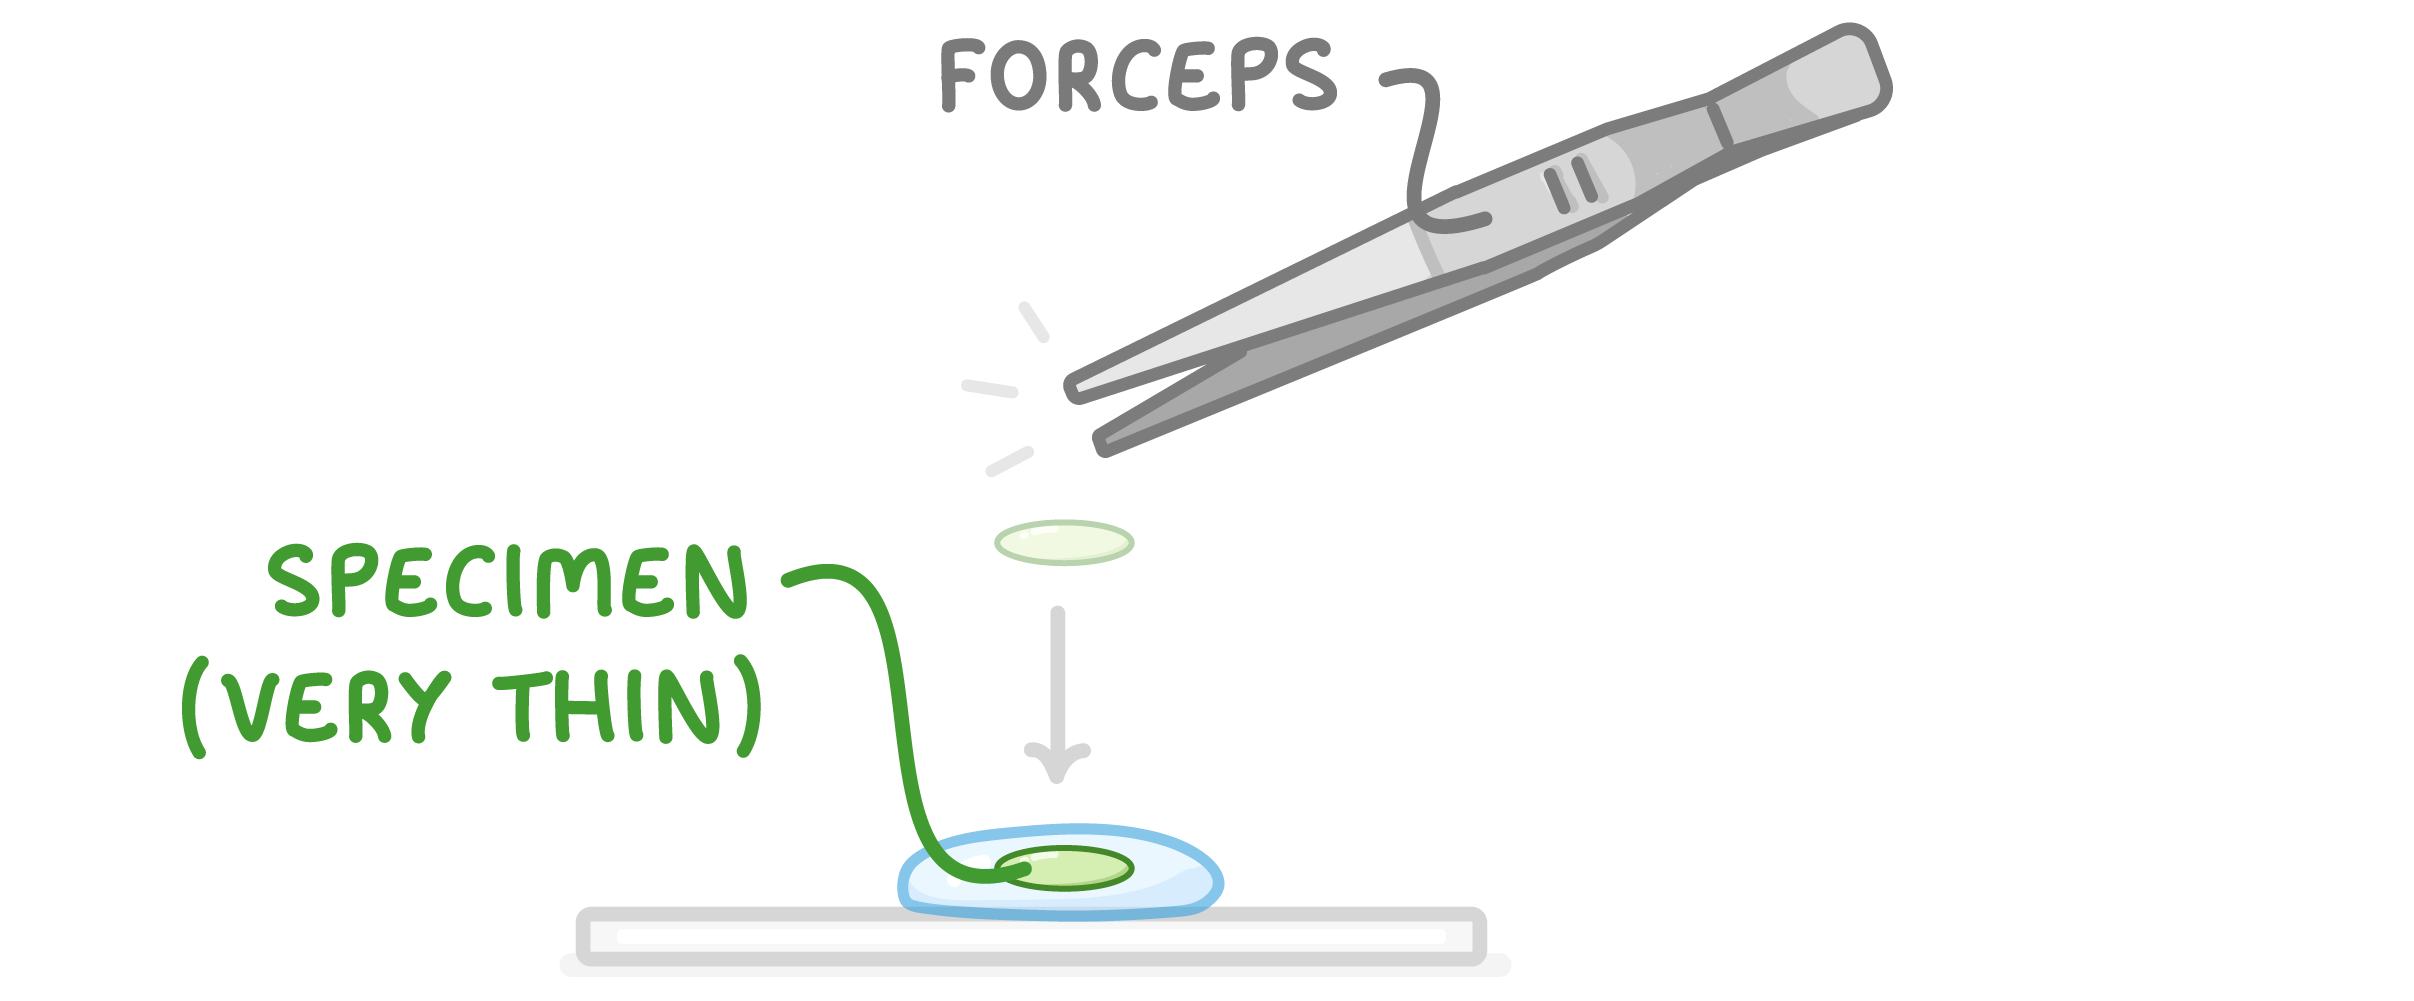
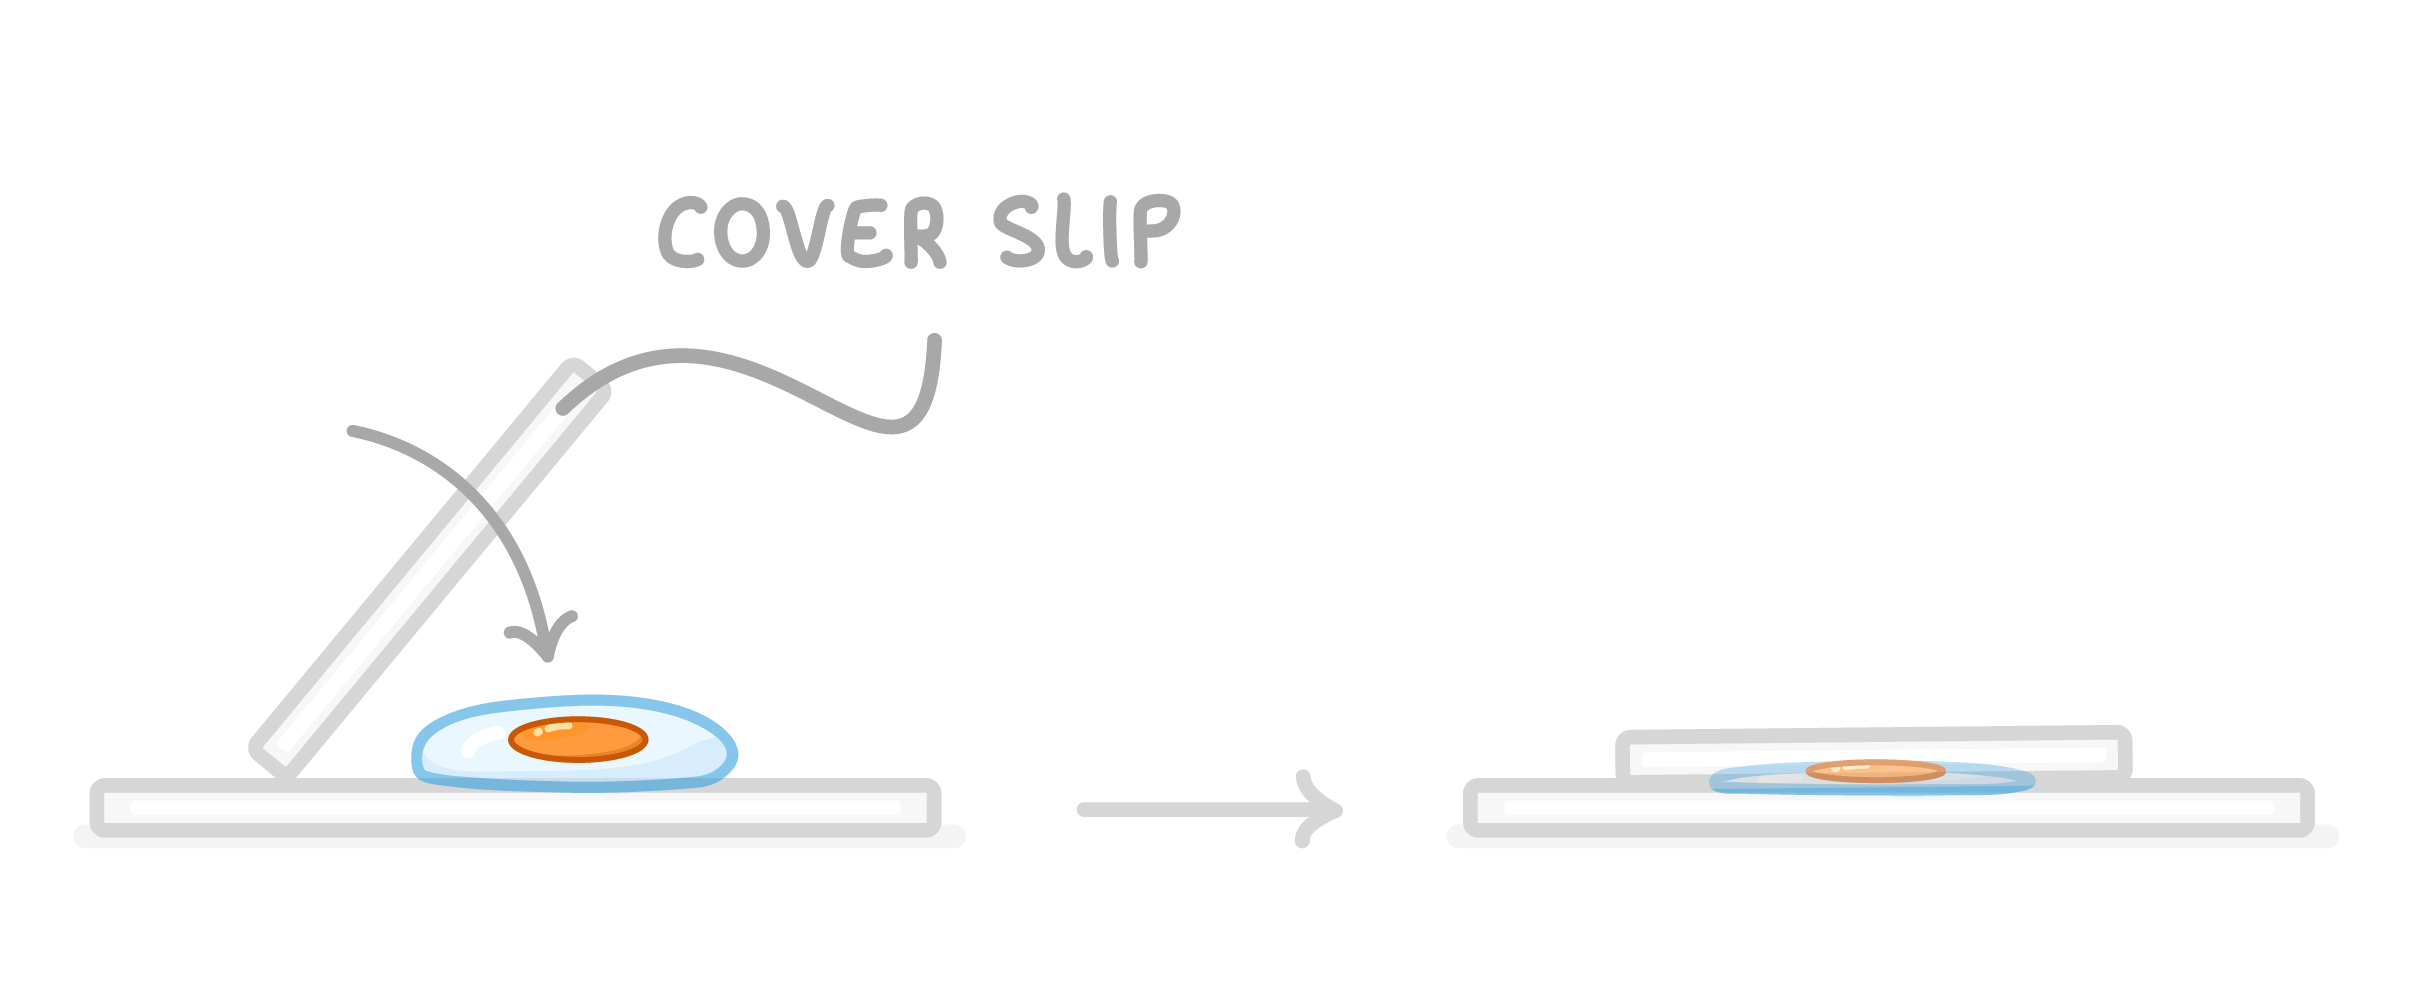
Sample preparation

To look at a specimen under a light microscope, you need to place the sample onto a microscope slide. Many samples are prepared using a method known as a wet (or temporary) mount.


The steps for preparing a wet mount are described below.

Illustration showing a pipette dispensing a water droplet onto a glass slide.
  1. Use a pipette to place a small drop of water onto the centre of the glass slide.

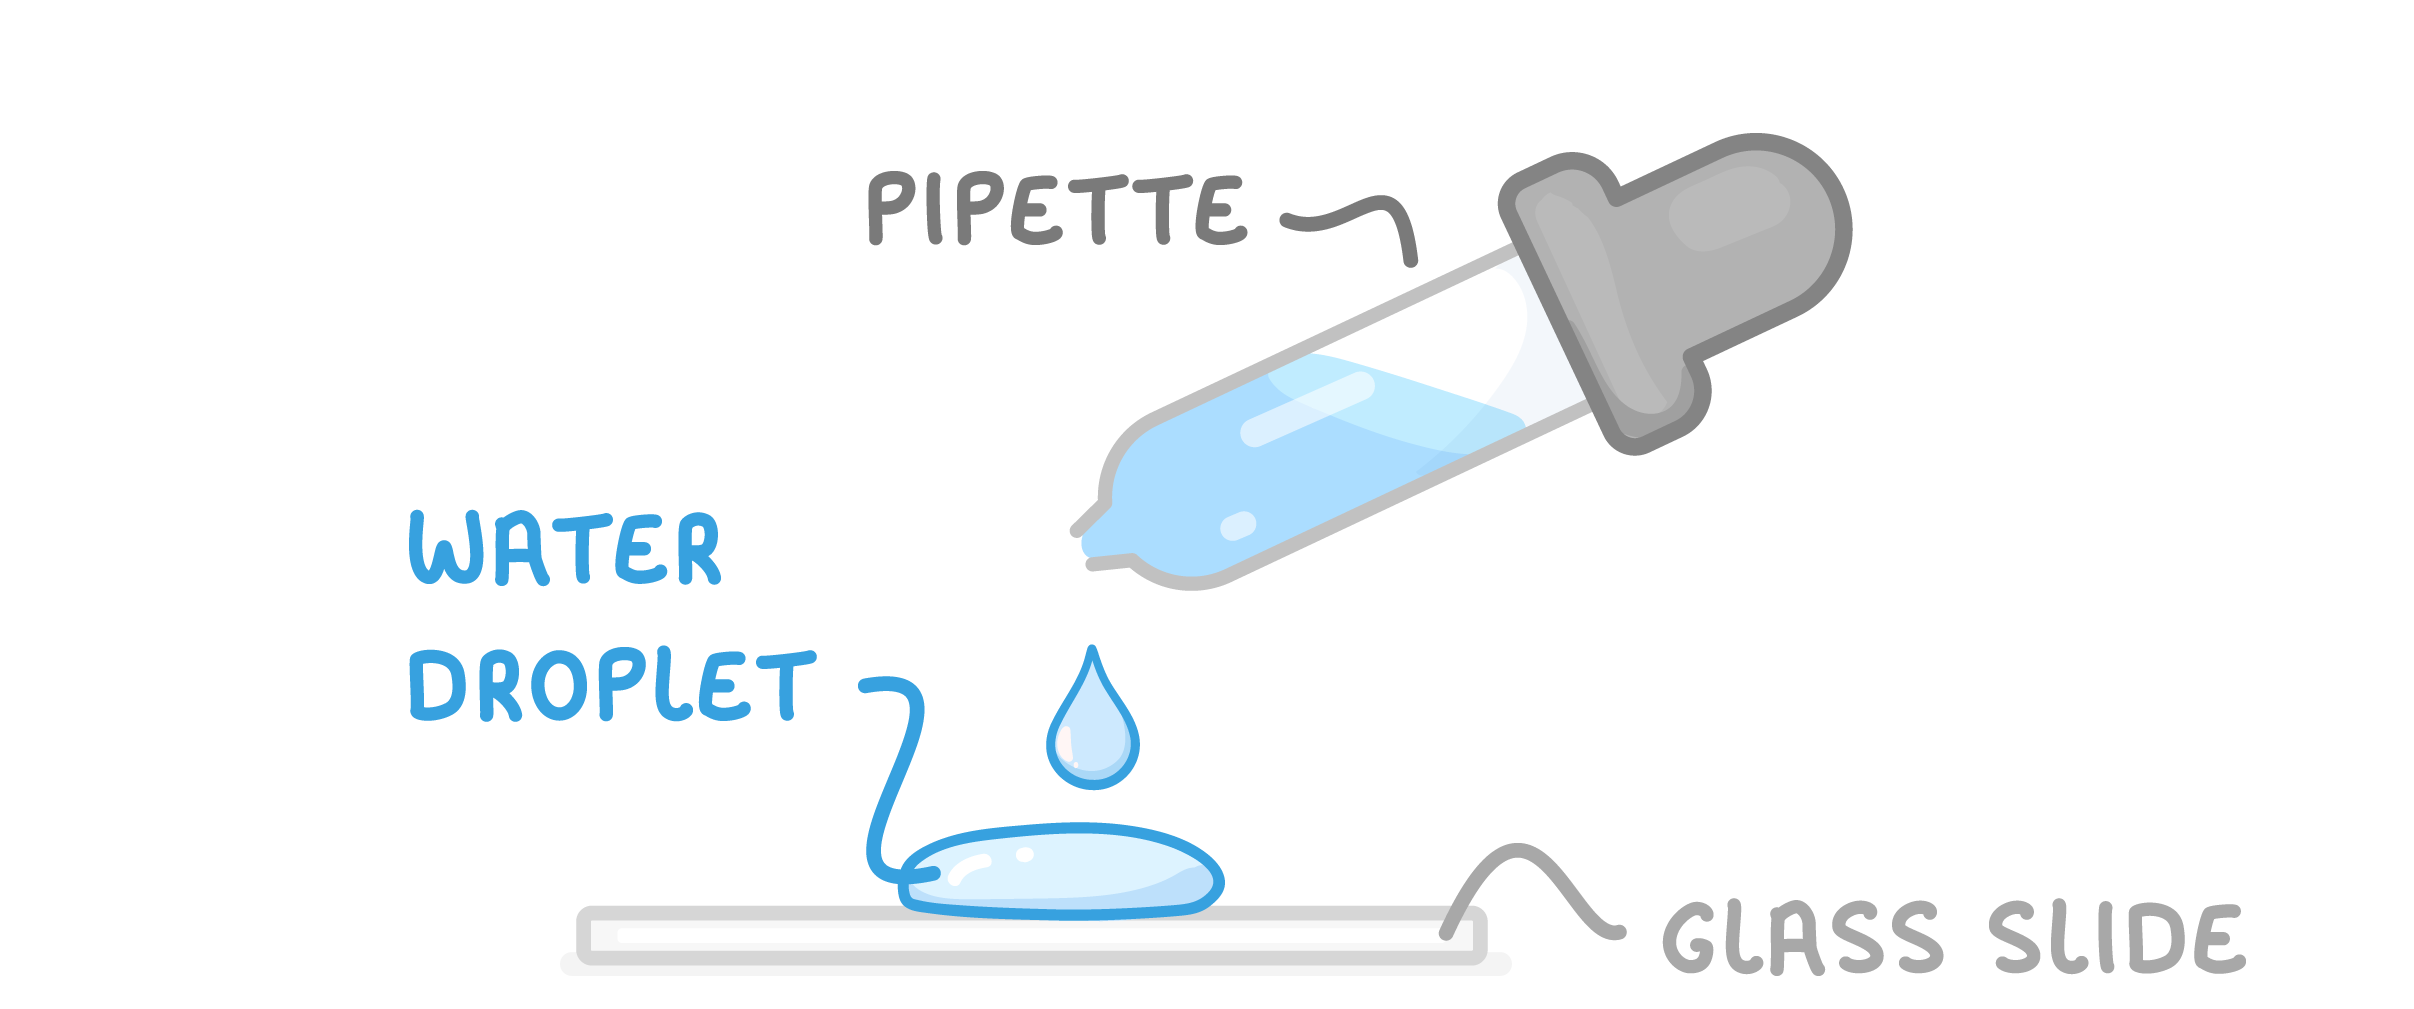
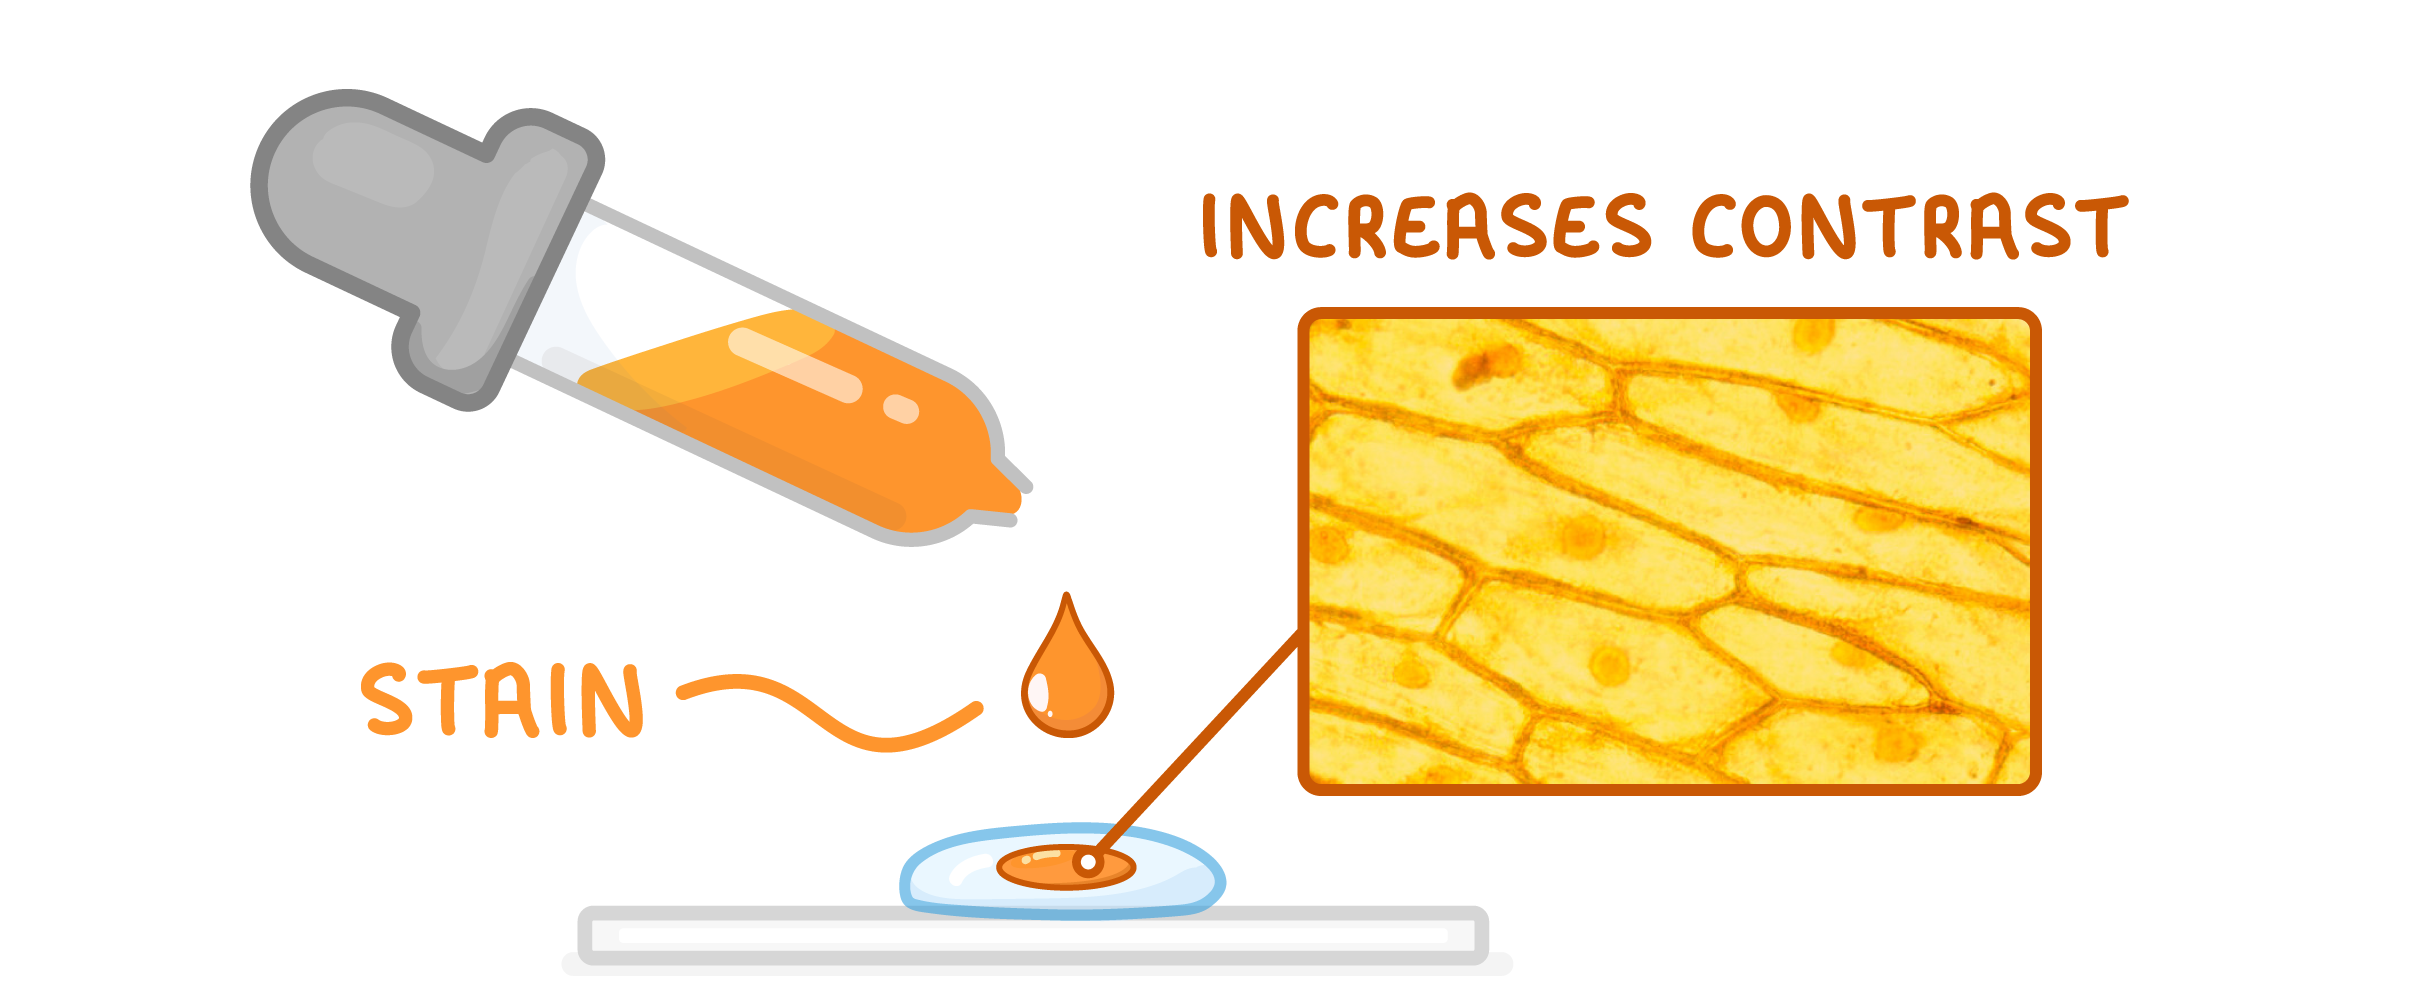
Differential staining (using more than one chemical stain) can also be used to distinguish between cells or organelles. 


Other methods for sample preparation include: 

  • Dry mounts - The specimen is placed directly onto the slide and covered with a cover slip.
  • Squash slides - A wet mount is prepared and the cover slip is pressed to squash the cells. 
  • Smear slides - The edge of a slide is used to smear the sample to create a thin, even coating on a separate slide.

Using a light microscope

Once a specimen is prepared, it is ready to be viewed using a light microscope.


Steps for viewing a microscope slide:

  1. Clip the prepared microscope slide onto the stage.
  2. Select the objective lens with the lowest power. 
  3. Use the coarse focus to bring the stage just below the objective lens. 
  4. Look down the eyepiece and use the coarse focus to move the stage downwards until the image is roughly in focus. 
  5. Use the fine focus to make the image clearer. 
  6. If a higher magnification is needed, swap to a more powerful objective lens and refocus.

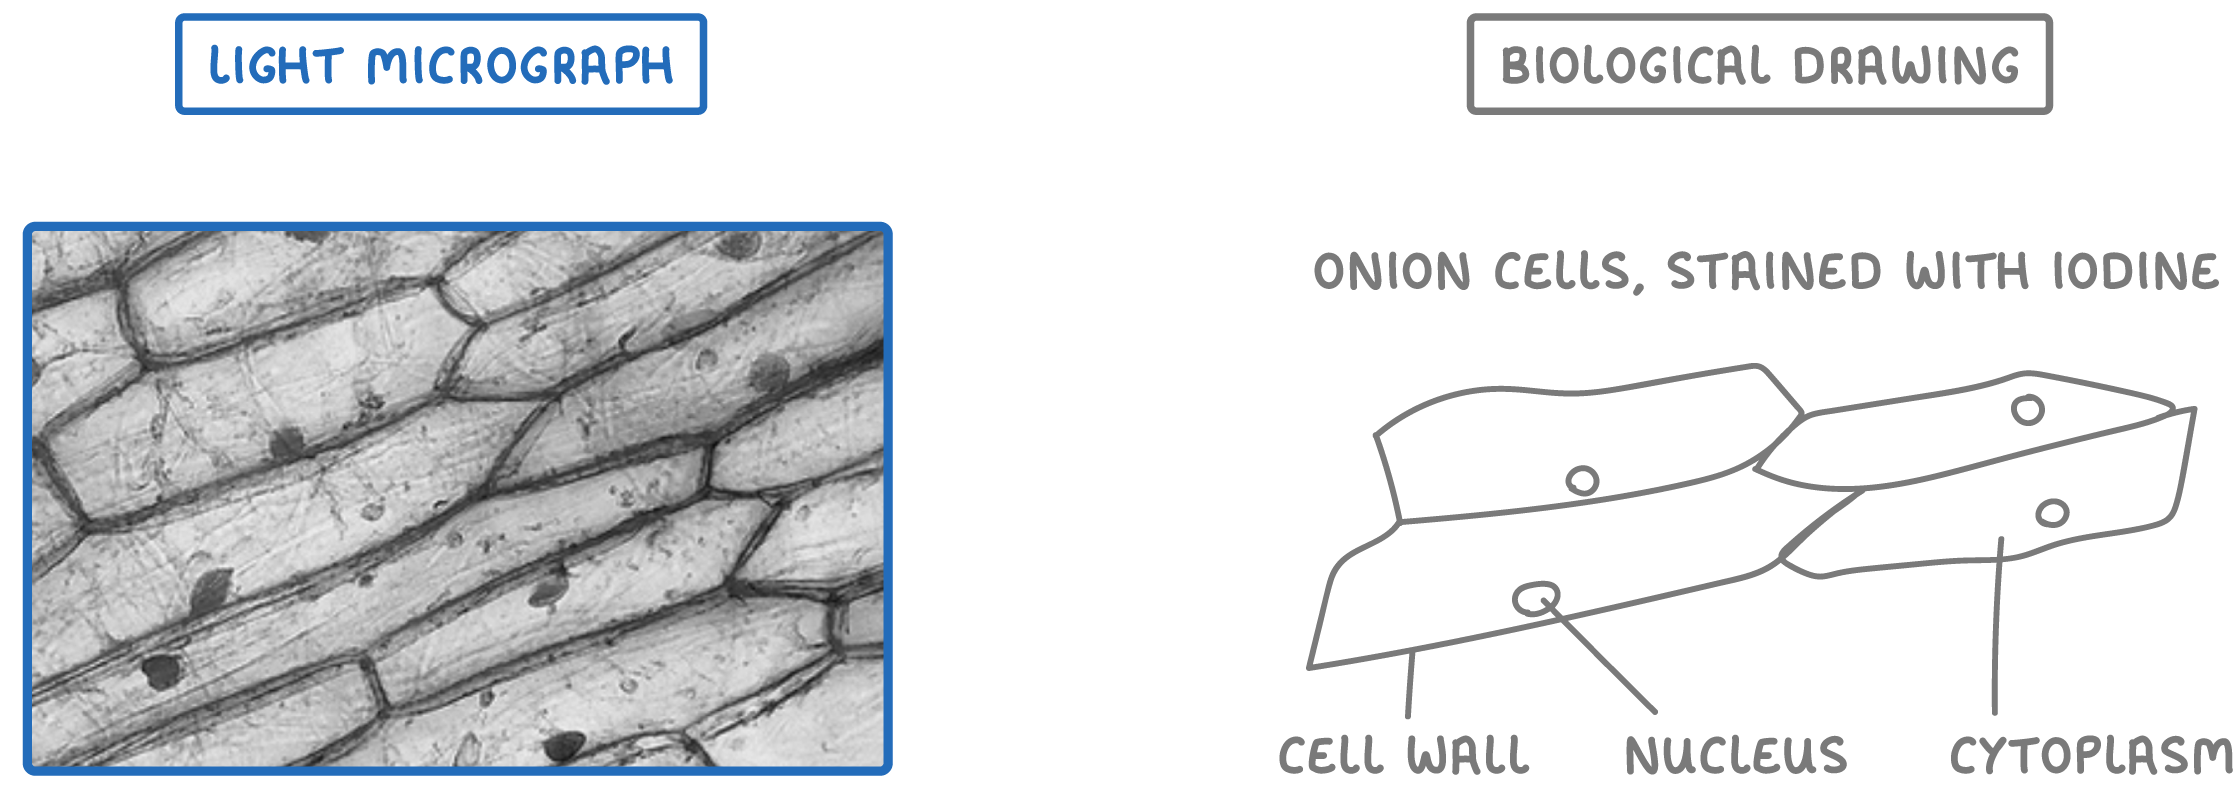
Biological drawings

Biological drawings are used to record observations when looking at specimens. The diagram below shows an example of a light micrograph and its biological drawing.

Comparison of a light micrograph and its biological drawing showing onion cells stained with iodine.

Biological drawings should not:

  • Include shading or colouring
  • Include arrow heads for labels 
  • Involve lines overlapping each other 

Biological drawings should: 

  • Include a title
  • State the magnification or scale
  • Be drawn with a sharp pencil 
  • Include smooth, continuous lines 
  • Include labels
  • Include accurate sizes of observable structures